Painting Patricia
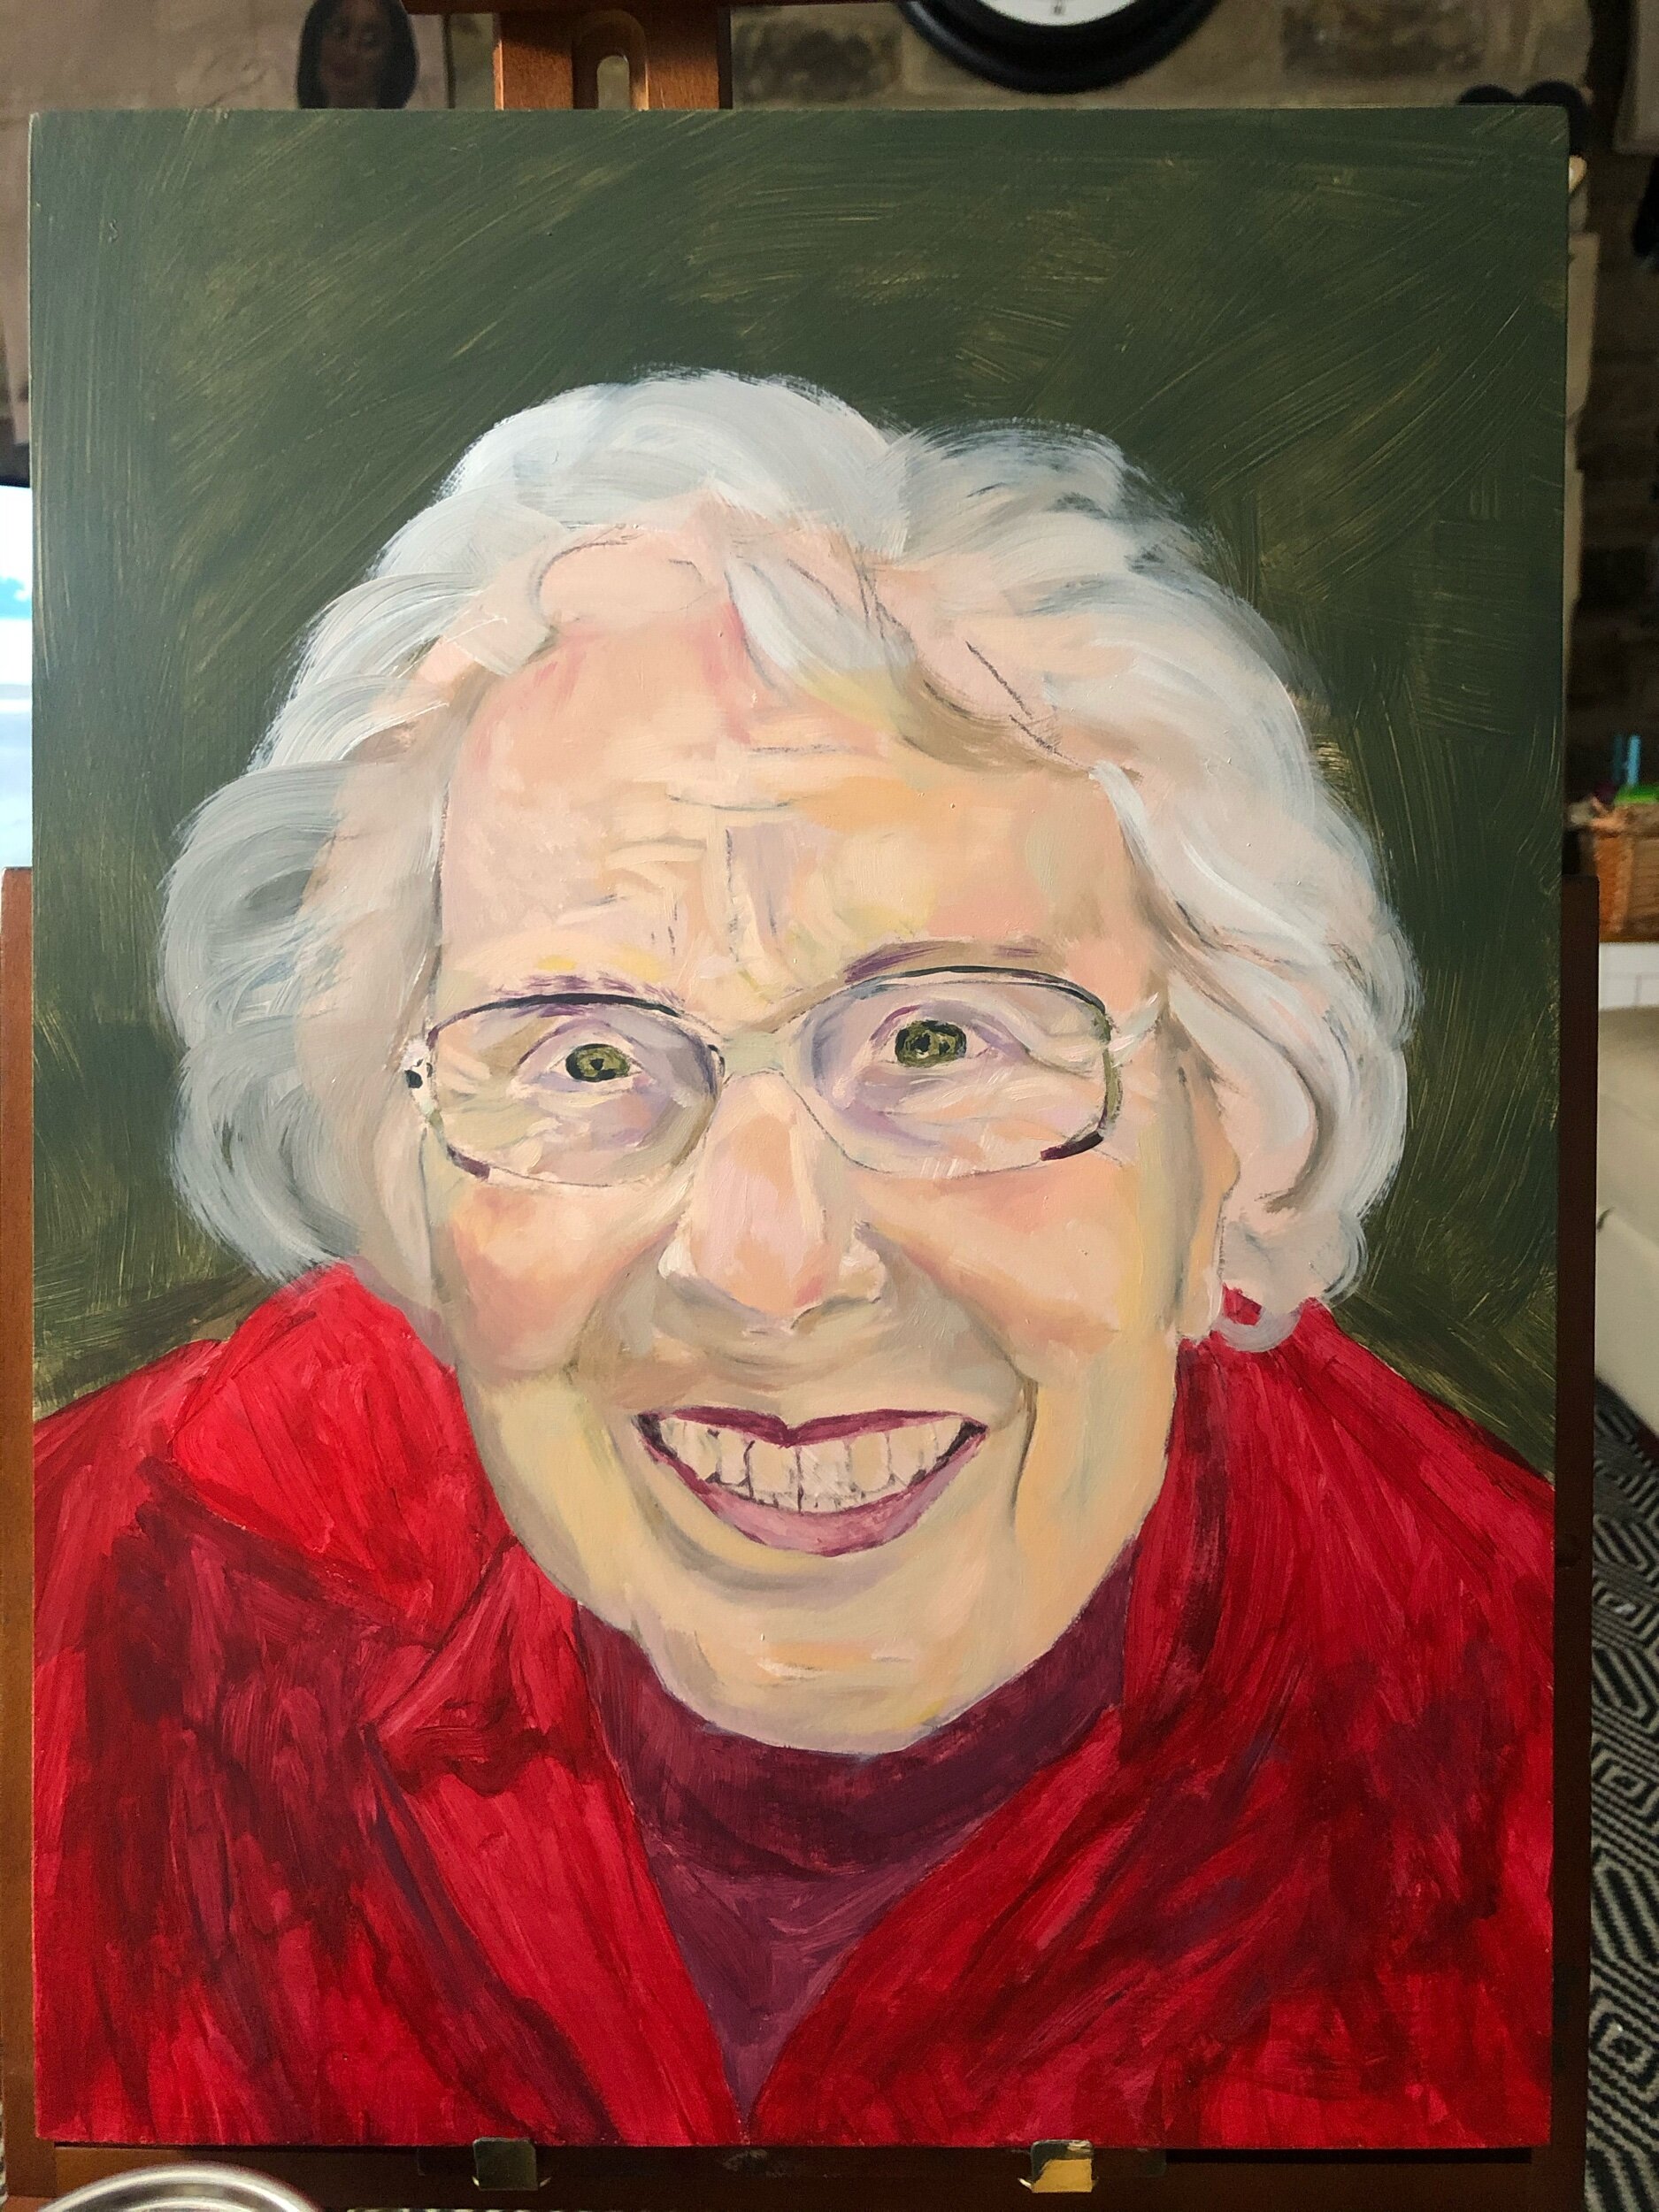
Work in Progress: Portrait of Patricia, Oil on Cradled Wood Panel, 12 x 16”
Let me introduce you to this absolute legend of a lady, Patricia. I was contacted by her Grandson to see if I could paint a portrait of her to arrive in time for her 90th Birthday. Thanks to that pesky C word, her family wasn’t able to give her the big celebration she deserved, but I’m thrilled I was able to create something special for her all the same. Armed with a selection of lovely photos and a real sense of her fun loving nature, I set about planning her painting.
Aside from her wonderful smile and the reason for the commission, the other reason I absolutely loved painting this portrait was the perfect recipe of size (a little bigger than A3), the crop, pose and of corse: surface! Cradled wood panel. It’s always a favourite. Usually I prep and prime the wood myself but time being tight with the run up to Christmas, I opted for a ready primed gesso panel from by Jackson’s. Now I don’t want to paint on anything else. The surface was so beautifully smooth and it took the paint really well. I love how the final brush strokes sit proud on the surface and the absorbency is just perfect for me.
(Side note, if you’d like to know how I prepare unprimed wood panels there’s a post of priming wood here)
T H E P L A N
Patricia’s birthday fell on a Sunday and I knew there were already delays within the postal service so keeping the painting process swift and drying time down to a minimum was going to be key, therefore planning and preparation was a must.
The plan was to:
1) Tone the surface with a tinted gesso mixture
2) Start with a clean charcoal outline drawing of the head
3) Do part or the underpainting in acrylic to block in key areas and landmarks
4) Work in thin layers using Walnut Alkyd Medium (this speeds up paint drying and thins my paint)
P R O C E S S
After sketching out the portrait at the correct scale, I traced this onto the surface using clean angular lines to mark out the key landmarks of the drawing. The wood had already been given an additional priming of gesso mixed with a dusty pink shade which I used to tone the canvas.
Because this particular image had very strong contrasting colours surrounding the face (dark green background and bright red coat/jumper), I wanted to ensure I had those colours in place before I added the skin tones. Having these colours already in place makes it easier to judge the skin tones in relation to the other colours so they do not appear too washed out or too saturated as could happen if you but in a strong/high contrast background at the end.
Painting the background in, I made sure to bring the green background in tight, overlapping the boundary of Patricia’s hair, in preparation for when I come back in with white and greys allowing for some of the background to show through in places around the edges.
A key theme in the painting of this portrait was layers. Here’s why:
Keeping the layers thin (using walnut alkyd medium) helped to speed up drying
Semi-translucency is how I achieved the depth, interest and realism of the skin
Adding wrinkles and natural skin imperfections in a layered manner stops them looking too overstated or unrealistic
Working in layers you can achieve a beautiful and more complex and interesting array of colours in the face
As the layers build, everything stands to come together and feel whole
And here is the final portrait. I managed to capture a few videos and time-lapse footage of the process.
Once I’ve had a moment to edit it together, I’ll add it to my YouTube Channel with a little more info about the steps taken and key tips. In the meantime, pop on over and click the subscribe button to be notified when this and other videos go live.


